
Call us in Seattle
+1 (800) 871-6550
Blog:
定制嵌入式Linux发布版本
2016年9月28日星期三
本博文将概述下面几个主题:
- 为什么需要定制嵌入式linux镜像
- 编译环境
- Qt应用部署
- Gihub工具
- 创建和编辑layers和recipes
- 编译镜像
简介
![]() 针对嵌入式系统预编译Linux镜像和发行版在创客运动中已经很普遍,这些发行版本已经包含组件(有时候可能超过必需的),因此学生和业余爱好者们可以很容易的开始开发。Ubuntu, Debian和Arch都属于这样的发行版。
针对嵌入式系统预编译Linux镜像和发行版在创客运动中已经很普遍,这些发行版本已经包含组件(有时候可能超过必需的),因此学生和业余爱好者们可以很容易的开始开发。Ubuntu, Debian和Arch都属于这样的发行版。
可是,当我们需要在计算机模块或者工业产品上面运行定制化或者特殊应用的Linux镜像时候,一个预编译的嵌入式Linux发行版本并不一定是最好的选择。编译一个镜像有一整套流程,在这个过程中,可以去掉任何不想要的但会导致开机时间增加,影响处理速度以及浪费内存空间的项目。很多时候我们因为系统里面有很多无用的应用和服务在运行导致系统资源浪费。举例说明,在headless应用中,桌面环境是不需要的,因此我们应该编译一个基于控制台的版本,也就是一个更快更轻量级的Linux版本。另一个使用预编译版本的弊端是授权问题,如Canonical (提供Ubuntu发行版本的公司) 就不允许在没有适当合作认证前提下随意定制和销售Ubuntu。与之相反,基于一个定制的Linux版本,我们可以完全控制所需安装的包以及使用的授权。因此,我们就可以根据项目软硬件需求拥有一个更优化的Linux镜像。
但是,如果我们想要将自己开发的Qt应用或者C应用集成到定制Linux版本中,我们该怎么做呢?是不是需要先编译应用然后复制到板子上面?还是需要先创建如”.ipk”或者”.deb”文件,然后复制到系统中去?如何将应用包含到”local.conf”文件的” IMAGE_INSTALL_append”中去?如何像其他嵌入式设备那样使应用在系统启动后自动运行?
在本文中,我们将演示如何使用OpenEmbedded/Yocto编译系统工具以自动方式来实现上面问题,我们将会快速展示基于bitbake来实现如编译,包安装,文件夹创建以及添加类似系统启动后应用自动运行服务的步骤。之后,我们将会为我们产品或者计算机模块获得一个定制化的嵌入式Linux发布版本。
尽管不同开发平台或者单板之间的操作细节可能有些不同,但是原理都是一致的。
为了跟随下面步骤操作,首先需要配置一个用于编译嵌入式Linux镜像的环境,请参考Toradex 开发者中心教程。Toradex使用OpenEmbedded-core 编译系统来编译镜像。基本上,这个教程包含:
- 安装准备
- Repo安装
- 载Toradex BSP version 2.5
然后我们会有如下的目录结构:
oe-core/
+-- build
¦   +-- conf
¦   +-- downloads
¦   +-- out-glibc
¦   +-- sstate-cache
+-- stuff
    +-- meta-angstrom
    +-- meta-browser
    (... other layers)
    +-- openembedded-core
因为我们应用是基于Qt,因此需要在”stuff”目录下添加 ”meta-qt5” layer,运行下面命令来添加:
~/oe-core/stuff/
$ git clone https://github.com/meta-qt5/meta-qt5.git -b fido
基于上面所有,我们可以开始编译我们自己的嵌入式Linux版本了。
使用Qt Creator 创建应用程序
为了演示需要,我们开发了一个双屏显示应用,实际上是两个程序运行在不同的显示屏。这类应用很常见,如机场值机柜台,或者在汽车中,一个是方向盘后面有仪表盘组,另一个是用于多媒体功能,GPS导航等的显示面板。
本文并未涉及Qt交叉编译应用的详细配置,关于这个信息请参考Toradex开发者中心文章。
上述两个应用程序的源代码可以从GitHub上面找到,请记住当我们编译镜像的时候,这两个应用程序会按照我们稍后编写的recipe文档指令自动下载和编译。
重要: 当镜像编译时候为了确定应用从哪里安装,务必添加下述红色部分代码到 ”.pro” Qt 项目文件:
#-------------------------------------------------
#
# Project created by QtCreator 2015-10-13T16:25:09
#
#-------------------------------------------------

QT       += core gui

greaterThan(QT_MAJOR_VERSION, 4): QT += widgets

TARGET = screen1
TEMPLATE = app

SOURCES += main.cpp\
       screen1.cpp

HEADERS  += screen1.h

FORMS    += screen1.ui

RESOURCES += \
   resources.qrc

# deployment on Linux
unix {
   target.path = /usr/bin/
   INSTALLS += target \
}
同步应用程序到GitHub
我们选择使用GitHub是因为它提供版本控制工具,同时由于它是云平台,这样任何人都可以访问存储在上面的项目和应用。不过,它也提供”private repository”选项。稍后,我们将会看到recipte通过GitHub下载应用,并自动安装到我们定制的Linux镜像中。为了达到这个目的,我们首先要将应用程序所在的本地文件夹同步到GitHub仓库。我们需要为每个应用创建一个对应的仓库。
从我们已经创建的GitHub账户进入,我们需要添加一个仓库。点击右上角的"+" ![]() ,然后选择"New Repository",在新加载的页面中,设定好"name", 添加 "description",最后点击"Create repository"。
,然后选择"New Repository",在新加载的页面中,设定好"name", 添加 "description",最后点击"Create repository"。

图片1:新仓库创建页面
在接下来的页面中,GitHub给出一些选项。为了方便,我们选择如下:

图片2:同步命令
上述命令在主机对应Qt应用文件夹中执行:screen1和screen2。请记得编辑URL为你的GitHub 用户名和仓库名。
~/myQtApplications/app-artigo-screen1/
$ git remote add origin https://github.com/giobauermeister/app-artigo-screen1.git
执行push命令后,输入GitHub用户名和密码,项目就会被上传了。对另外一个应用执行同样操作。进入你的GitHub profile页面,就可以看到新的仓库了。

图片3:GitHub 仓库选项卡
创建layer和recipes
什么是recipe?按照Yocto Reference Manual,recipes是以”.bb”后缀结尾的文件,recipe主要包含有关给定软件的信息,包括从哪里获取源,应用补丁,如何编译源代码以及如何在最后打包所有。
添加一个新recipe到编译环境比较好的方式是将其放到一个新的layer里面,Layers通常是按照机器类型,功能或相似条目组织的一组meta-data。我们用meta-toradex layer为例,Toradex通过这个layer给客户提供Board Support Packages (BSP),定制化 kernel, U-boot, 图形特性等很多内容。另一些大家熟知的layer 如meta-beagleboard, meta-fsl-arm和meta-intel-galileo。此外,我们也发现一些很有趣的layer比如meta-games, meta-maker以及无人机相关的meta-uav。大量的layer列表可以从这里找到。作为示例,我们这里创建一个新layer "meta-projects"。
进入"oe-core/stuff"文件夹,我们可以发现很多layers,包括上面提到的meta-toradex。在这里创建新文件夹"meta-projects"。
~/oe-core/stuff/
$ mkdir meta-projects
进入"meta-projects"文件夹,并创建一个新文件夹"conf"。
~/oe-core/stuff/meta-projects/
$ mkdir conf
进入"conf",创建一个新文件"layer.conf",并添加下面内容。
~/oe-core/stuff/meta-projects/conf/
$ vi layer.conf
# We have a conf and classes directory, add to BBPATH
BBPATH .= ":${LAYERDIR}"

# We have recipes-* directories, add to BBFILES
BBFILES += "${LAYERDIR}/recipes-*/*/*.bb \
     ${LAYERDIR}/recipes-*/*/*.bbappend"

BBFILE_COLLECTIONS += "meta-projects"
BBFILE_PATTERN_meta-projects = "^${LAYERDIR}/"
BBFILE_PRIORITY_meta-projects = "6"
上面内容是一个layer配置文件所需的最简格式,注意我们layer名字用红色显示。
Recipes在layer文件夹中按照应用类型,软件分类等组织,下面是meta-toradex layer。
~/oe-core/stuff/meta-toradex/
$ ls
total 84
buildconf
classes
conf
recipes
recipes-benchmark
recipes-bsp
recipes-connectivity
recipes-core
recipes-devtools
recipes-fsl
recipes-gnome
recipes-graphics
recipes-kernel
recipes-lxde
recipes-mozilla
recipes-multimedia
recipes-qt
recipes-sato
recipes-support
release-notes
tasks
我们可以发现所有关于Qt相关的recipes和应用都在”recipes-qt”文件夹里面,而所有和内核相关的都在”recipes-kernel”文件夹里面,依此类推。因为我们的应用是和Qt相关,因此我们在”meta-projects”目录下创建”recipes-qt”文件夹。
~/oe-core/stuff/meta-projects/
$ mkdir recipes-qt
在”recipes-qt”文件夹里面,我们为每一个应用程序创建一个以应用名字命名的文件夹。
~/oe-core/stuff/meta-projects/recipes-qt/
$ mkdir qt-artigo-embarcados-screen1
$ mkdir qt-artigo-embarcados-screen2
编辑recipes功能和项目(GitHub下载,自动运行等)
我们基于下面实现编译和安装一个”Hello World” C程序的简单recipes来编写我们的recipes。
#
# This file was derived from the 'Hello World!' example recipe in the
# Yocto Project Development Manual.
#
SUMMARY = "Simple helloworld application"
SECTION = "examples"
LICENSE = "MIT"
LIC_FILES_CHKSUM = "file://${COMMON_LICENSE_DIR}/MIT;md5=0835ade698e0bcf8506ecda2f7b4f302"

SRC_URI = "file://helloworld.c"

S = "${WORKDIR}"

do_compile() {
    ${CC} helloworld.c -o helloworld
}
do_install() {
    install -d ${D}${bindir}
    install -m 0755 helloworld ${D}${bindir}
}
C 程序
#include
int main(int argc, char **argv)
{
   printf("Hello World!\n");
   return 0;
}
在每一个recipe文件夹,我们创建一个作为recipe本身的”.bb”文件。这个文件应包含下面一些基本变量如:
- DESCRIPTION – recipe简述以及其包含的软件
- SECTION – recipe 类型说明
- LICENSE – recipe或软件适用的license文件
- LIC_FILES_CHKSUM – icense文件的Checksum号
- SRC_URI – 应用或者其源代码地址
- SRCREV – GitHub对应的所需commit 标签
我们第一个程序所用的recipe文件如下,第二个recipe依此类推。
~/oe-core/stuff/meta-projects/recipes-qt/qt-artigo-embarcados-screen1/
$ vi qt-artigo-embarcados-screen1_0.1.bb
DESCRIPTION = "Essa aplicação faz parte do artigo para o embarcados"
SECTION = "examples"
LICENSE = "MIT"
LIC_FILES_CHKSUM = "file://${COMMON_LICENSE_DIR}/MIT;md5=0835ade698e0bcf8506ecda2f7b4f302"
PR = "r0"

SRC_URI = "git://github.com/giobauermeister/app-artigo-screen1.git;protocol=git;branch=master"

SRCREV = "e1200176d801393cda662ca60552c94a2b023b33"

S = "${WORKDIR}/git"

inherit systemd

DEPENDS = "qtdeclarative qtgraphicaleffects"
RDEPENDS_${PN} = "qtdeclarative-qmlplugins qtgraphicaleffects-qmlplugins"

require recipes-qt/qt5/qt5.inc

do_install() {
     oe_runmake INSTALL_ROOT=${D} install
     install -m 0755 ${WORKDIR}/git/qt-artigo-embarcados-screen1.sh ${D}${bindir}
     install -d ${D}${systemd_unitdir}/system/
     install -m 0644 ${WORKDIR}/git/qt-artigo-embarcados-screen1.service \             ${D}${systemd_unitdir}/system
}

NATIVE_SYSTEMD_SUPPORT = "1"
SYSTEMD_PACKAGES = "${PN}"
SYSTEMD_SERVICE_${PN} = "qt-artigo-embarcados-screen1.service"
分析上面recipe,我们可以发现一些重要项目。
这里我们声明了所使用的license.
LICENSE = "MIT"
LIC_FILES_CHKSUM = "file://${COMMON_LICENSE_DIR}/MIT;md5=0835ade698e0bcf8506ecda2f7b4f302"
MIT license在开源项目中被广泛使用,在common license文件夹中也可以找到。
~/oe-core/stuff/openembedded-core/meta/files/common-licenses/MIT
Checksum 号可以通过一个Linux 应用 md5sum获取,如下操作:
$ md5sum MIT
0835ade698e0bcf8506ecda2f7b4f302  MIT
如果项目不是开源的,其他license也可以被直接使用或者创建,不过请一定声明正确的license文件路径和checksum。
“SRC_URI” 声明了应用的路径,在文本情境是一个GitHub路径。应用被下载,编译,并安装在我们镜像的root 文件系统下。
SRC_URI = "git://github.com/giobauermeister/app-artigo-screen1.git;protocol=git;branch=master"
SRCREV = "e1200176d801393cda662ca60552c94a2b023b33"
S = "${WORKDIR}/git"
The “SRCREV”参数声明要使用的仓库commit标签。可以进入GitHub上你的 repository commit部分来查询要使用的标签,https://github.com/giobauermeister/app-artigo-screen1/commits/master,然后点击下面标示的按键来保存标签,建议使用最新的commit。

下面这里我们声明了一些Qt依赖
DEPENDS = "qtdeclarative qtgraphicaleffects"
RDEPENDS_${PN} = "qtdeclarative-qmlplugins qtgraphicaleffects-qmlplugins"
require recipes-qt/qt5/qt5.inc
下一步,我们来准备do_install功能,是负责用于安装我们应用初始化脚本的,同时,我们还需要一个unit configuration file(.service),负责自动启动我们应用。请见下面红色标记文件。
每一个程序的初始化脚本和unit文件都应存放在对应的GitHub仓库。
以”.service”结尾的unit configuration file文件编码了由systemd控制和管理的操作流程。Service 文件可以在” /etc/systemd/system/”下找到,为了分配在”/lib/systemd/system/”下也有。服务可以通过systemctl命令被启动或者永久使能。
inherit systemd

do_install() {
oe_runmake INSTALL_ROOT=${D} install

install -m 0755 ${WORKDIR}/git/qt-artigo-embarcados-screen1.sh ${D}${bindir}

install -d ${D}${systemd_unitdir}/system/
      install -m 0644 ${WORKDIR}/git/qt-artigo-embarcados-screen1.service \ ${D}${systemd_unitdir}/system
}

NATIVE_SYSTEMD_SUPPORT = "1"
SYSTEMD_PACKAGES = "${PN}"
SYSTEMD_SERVICE_${PN} = "qt-artigo-embarcados-screen1.service"
更多关于systemd的信息请见Toradex开发者中心文章。
请注意安装目录是在Qt Creator project file (.pro)里面定义,如在本文” 使用Qt Creator 创建应用程序”章节所述。
Unit fileqt-artigo-embarcados-screen1.service 内容如下:
[Unit]
Description=Starts Embarcados Qt demo application screen1
After=multi-user.target

[Service]
Type=simple
ExecStart=/usr/bin/qt-artigo-embarcados-screen1.sh

[Install]
WantedBy=multi-user.target
另一个应用的unit file除了更改对应的”ExecStart”路径,其他是完全一样的。
注意到unit文件调用了初始化脚本,screen1应用的脚本内容如下:
#!/bin/bash
ts_calibrate
while : ; do
export QT_QPA_EGLFS_HIDECURSOR=1
export QT_QPA_EGLFS_FB=/dev/fb0
screen1 -platform eglfs
done
另一个应用的脚本文件只是略作修改
#!/bin/bash
while : ; do
export QT_QPA_EGLFS_HIDECURSOR=1
export QT_QPA_EGLFS_FB=/dev/fb2
screen2 -platform eglfs
done
注意命令” export QT_QPA_EGLFS_FB=/dev/fb0”,这个命令用来声明程序运行使用的framebuffer,这个新参数是在Qt5中引入的。
上面两个脚本都需要上传到GitHub每个应用对应的仓库,并在系统镜像编译中被自动下载和安装。
编译image
到这里,我们已经完成了下面项目:
- 一个配置好的编译环境
- GitHub上的Qt应用程序
- 创建好的layer meta-projects和recipes
接下来进入oe-core目录,对“export”文件进行source操作来设置环境。在第一次调用时候,会同时在build/conf目录下创建一些最简的配置文件”*.conf”。
~/oe-core/
$ . export
这个命令同时会让我们进入”build”目录下,在这里我们将”bitbake”我们的镜像。
在”build/conf”目录下我们发现有”bblayer.conf”和”local.conf”文件。包含我们镜像所有资源的layers在”bblayer.conf”文件中被列出。之前我们在”stuff”文件夹复制了”meta-qt5” layer,现在我们将”meta-qt5”和”meta-projects”都添加到”bblayers.conf”文件。
~/oe-core/build/conf/
$ vi bblayers.conf
...
 ${TOPDIR}/../stuff/meta-lxde \
 ${TOPDIR}/../stuff/meta-browser \
 ${TOPDIR}/../stuff/meta-qt5 \
在”local.conf”文件中我们发现定义了一些编译选项和设置,如编译目标平台,使用多少核心去编译,下载路径等。我们创建一个新的变量” IMAGE_INSTALL_append”,用来指明将被安装的包括我们Qt应用在内的一些项目。
进入”local.conf”文件,添加/修改如下内容:
~/oe-core/build/conf
$ vi local.conf
MACHINE ?= "colibri-imx6"
ACCEPT_FSL_EULA = "1"
DISTRO_FEATURES_remove = "x11 wayland"
IMAGE_INSTALL_remove = "eglinfo-x11"
IMAGE_INSTALL_append= " qtbase qtbase-fonts qtbase-plugins libxkbcommon \
qt-artigo-embarcados-screen1 \
qt-artigo-embarcados-screen2 \
tslib tslib-calibrate tslib-conf tslib-tests"
ACCEPT_FSL_EULA 变量需要被设置,以确认我们接受来自原来Freescale的license条款。在所有iMX6平台都需要声明这个。另外,我们也移除了一些桌面相关的项目,因为我们的镜像是console镜像。
在编辑完上面两个配置文件后,我们进入”build”目录运行下面”bitbake”命令开始编译流程。
~/oe-core/build
$ bitbake console-trdx-image
更新镜像到计算机模块
镜像更新步骤在Toradex 开发者中心文档已经被详细描述,请见Flashing Embedded Linux to iMX6 modules。
测试我们的最终镜像
更新镜像后,Linux会自动运行,之后可以看到我们的应用会自动启动。另外也可以通过一些启动信息看到我们的systemd文件也启动了。
[  OK  ] Started Serial Getty on ttymxc0.
        Starting Serial Getty on ttymxc0...
[  OK  ] Reached target Login Prompts.
[  OK  ] Reached target Multi-User System.
        Starting Update UTMP about System Runlevel Changes...
[  OK  ] Started Embarcados Qt demo application screen1.
        Starting Embarcados Qt demo application screen1...
[  OK  ] Started Embarcados Qt demo application screen2.
        Starting Embarcados Qt demo application screen2...
[  OK  ] Started Hostname Service.
[  OK  ] Started WPA supplicant.
[  OK  ] Started Update UTMP about System Runlevel Changes.
[    8.986085] mxc_sdc_fb fb.19: 1920x1080 h_sync,r,l: 44,88,148  v_sync,l,u: 5,4,36 pixclock=148500000 Hz
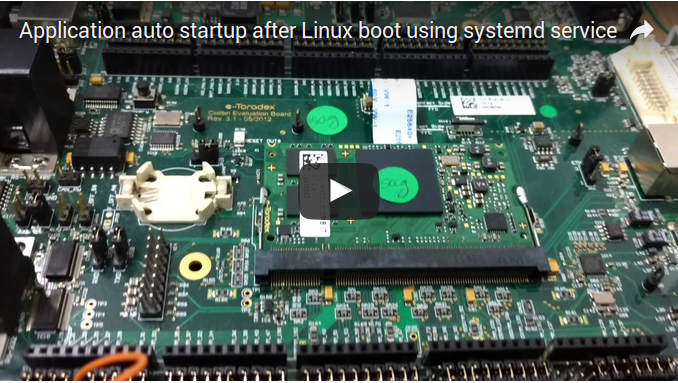
关于启动流程和应用自动加载请参考下面视频演示。
总结
本文旨在为嵌入式系统编译定制化镜像提供基本指导。我们了解到一个镜像可以被定制,改进后应用在一个产品中。我们也了解到关于git,layer和reciptes的概念。文本许多理念也在被一些公司使用,如Toradex,一个计算机模块提供商。Toradex通过layers “meta-toradex”和”meta-toradex-extra”向它的客户提供非常多的开发资源,包括Board Support Package,examples,demos等。谁知道下一个是不是就是你,通过创造images,layers或者applications来引领嵌入式系统世界新的革命!
参考文档
http://developer.toradex.com/how-to/how-to-set-up-qt-creator-to-cross-compile-for-embedded-linux
http://www.yoctoproject.org/docs/current/dev-manual/dev-manual.html#new-recipe-writing-a-new-recipe
http://playerstage.sourceforge.net/wiki/Cross_Compile_Player_with_Openembedded_and_BitBake#Player_Recipe
http://bec-systems.com/site/501/best-practices-for-building-qt-applications-with-openembedded
https://wiki.yoctoproject.org/wiki/Creating_a_recipe_for_a_Qt_application
https://github.com/meta-qt5
https://wiki.yoctoproject.org/wiki/Building_your_own_recipes_from_first_principles
https://wiki.yoctoproject.org/wiki/How_do_I
http://www.yoctoproject.org/docs/current/ref-manual/ref-manual.html
https://opensource.org/licenses/MIT
http://choosealicense.com/licenses/mit/
http://www.freedesktop.org/software/systemd/man/systemd.service.html
https://wiki.archlinux.org/index.php/Systemd
https://coreos.com/os/docs/latest/getting-started-with-systemd.html
http://developer.toradex.com/knowledge-base/how-to-autorun-application-at-the-start-up-in-linux
http://www.embeddedlinux.org.cn/OEManual/recipes_examples.html
http://wiki.openmoko.org/wiki/BitBake_recipe
https://www.wolfssl.com/wolfSSL/Docs-beginners-guide-yocto-openembedded-recipe.html
文本最初以葡萄牙语发表于Embarcados.com,请见这里。
作者: Giovanni Bauermeister, Toradex Brasil
1 comments
评论
Please login to leave a comment!
Dirk Beinert, infoteam Software AG - 6 years 7 months | Reply
Thank you for the concise description!
But I still have problems deploying deb packages instead of ipk. Although I have changed local.conf accordingly.
best regards
Dirk
Leonardo Veiga, Toradex - 6 years 7 months | Reply
Dear Dirk,
I'm sorry but I couldn't fully understand your question. The image provided by Toradex uses OPKG, which does not handle DEB packages.
If you would like to describe the issue in more detail, including log from OpenEmbedded, please direct your question to our support team through the Toradex Community (https://www.toradex.com/community) or via support@toradex.com.
Thank you and best regards.
Dirk Beinert - 6 years 7 months | Reply
Dear Leonardo,
thank you very much for your quick reply. I would like to build an image using dpkg and NOT opkg. Therefore I would like to overwrite: "# We default to ipk:" within local.conf. Is a change of the package manager possible at all?
Best regards
Leonardo Veiga, Toradex - 6 years 7 months | Reply
Dear Dirk,
Since you are already using OpenEmbedded to build your image, what specifically do you need to install using dpkg? Please read the questions below posted in our community and see if they can help you:
https://www.toradex.com/community/questions/1176/install-ubuntu-packages-on-your-os-using-apt-get.html
https://www.toradex.com/community/questions/2885/how-can-i-install-debian-on-colibri-vf61.html
Best regards,
Leonardo
Dirk Beinert - 6 years 7 months | Reply
Now I have a Toradex Apalis image using dpkg and its associated /var/lib/dpkg/status.
local.conf:
PACKAGE_CLASSES_append = "package_deb", PACKAGE_CLASSES_remove = "package_rpm", PACKAGE_CLASSES_remove = "package_ipk"
meta-angstrom/conf/distro/include/angstrom.inc:ANGSTROM_PKG:_FORMAT ?= "deb"
layers/meta-toradex-demos/recipes-image/Images/angstrom-lxde-image.bb:
IMAGE_INSTALL += "dpkg"
Best regards
Dirk
Leonardo Veiga, Toradex - 6 years 7 months | Reply
Dear Dirk,
Nice! Thank you for sharing your solution.
Best regards,
Leonardo